EHall Pass Registered Schools Provide EHallPass Login Username and Password to Their Students Eduspire Solutions introduces EHall Pass to transform multiple schools into intelligent schools through a digital classroom website.
At the core of Ehallpass Login lies a robust security infrastructure meticulously designed to safeguard sensitive information. Encryption and other cutting-edge security measures protect login credentials and pass history, ensuring confidentiality and resilience against potential breaches or unauthorized access.
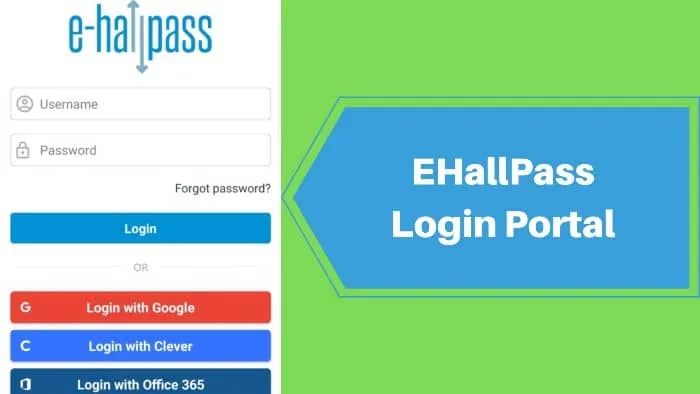
What is EHallpass?
EHallpass replaces antiquated paper hall passes with a seamless digital system for requesting, approving, and tracking student movement within schools. The key capabilities include:
The Secure Framework of Ehallpass Login
At the core of Ehallpass Login lies a robust security infrastructure meticulously designed to safeguard sensitive information. Encryption and other cutting-edge security measures protect login credentials and pass history, ensuring confidentiality and resilience against potential breaches or unauthorized access.
- Web and mobile interfaces for students, teachers, and staff
- Custom hall pass types (bathroom, nurse, office, etc.)
- Configurable time limits and settings
- Real-time notifications and tracking
- Kiosk mode for easy student check-in/out
- Detailed reporting on usage
The digital approach aims to increase student supervision, reduce misuse, minimize classroom disruptions, and gain data-driven insights into hall pass activities.
Creating an EHallpass Account: A Step-by-Step Guide
1. Visit the EHallpass Website
Begin by navigating to the official EHallpass website at www.ehallpass.com using your preferred web browser. Look for the prominently displayed “Sign Up” link positioned at the top right corner of the webpage.
2. Select Your Role
Upon clicking the “Sign Up” link, you will be prompted to choose your role within the educational institution. Select whether you are a student, teacher, administrator, or any other applicable role. This step defines the permissions and access levels associated with your account.
3. Input Your School Email
Enter your official school email address into the designated field. It’s crucial to use your school-provided email as it helps verify your affiliation with the educational institution and ties your account to the school domain.
4. Create a Password
Craft a robust and secure password for your EHallpass account. Ensure the password includes a mix of uppercase and lowercase letters, numbers, and special characters to enhance security.
5. Accept Terms of Use
Carefully review and agree to the terms of service and privacy policy documents provided by EHallpass. Understanding these terms ensures compliance and helps you comprehend the guidelines governing the use of the platform.
6. Verify Your Email
Following account creation, check your registered school email inbox for a verification message from EHallpass. Click on the verification link enclosed within the email to confirm and authenticate your email address.
Once you complete these steps, your EHallpass account will be successfully created, enabling you to proceed with logging in and accessing the system.
Logging Into Your EHallpass Account: Accessing the Platform
1. Go to EHallpass.com
Whenever you need access to your EHallpass account, open your web browser and visit the official EHallpass website by typing www.ehallpass.com into the address bar.
2. Click the Login Button
On the homepage, locate and click on the “Login” button positioned in the top right corner of the screen. This action directs you to the login page where you can input your credentials.
3. Input Your Credentials
Enter the email address associated with your EHallpass account into the provided field. Then, input the secure password you set during the account creation process.
4. Click the Login Button
To complete the login process, click on the “Login” button. This action grants you access to your personalized EHallpass dashboard or home screen, enabling you to utilize the platform’s features.
In the event of login difficulties, utilize the “Forgot Password” link available on the login page to reset your access credentials. Should issues persist, contact your school’s IT support for further assistance with the login process.
Ehallpass Login Methods: Enhancing User-Friendly Access
The Ehallpass platform is designed to offer multiple, user-friendly login methods catering to different preferences and facilitating easy access for users across various educational roles. Here’s an expanded overview of each login method:
EHallPass Website: Streamlined Access Steps
The direct login process via the EHallPass website prioritizes simplicity and efficiency. Users are guided through a straightforward procedure:
- Navigate to the EHallPass Website: Users begin by opening their web browser and visiting the dedicated EHallPass website.
- Click on the Login Option: The homepage features a clearly marked “Login” button positioned at the top right corner. Clicking this initiates the login process.
- Enter User Credentials: Users input their designated username and password in the provided fields on the login page.
- Opt for “Remember Me” (Optional): The system offers a convenient “Remember Me” option, allowing users to save their login credentials for future sessions.
- Initiate Login: After verifying the entered credentials, users gain access to the EHallPass dashboard, providing access to the platform’s comprehensive array of features and tools.
Login Using Classlink: Integration for Effortless Access
Classlink integration provides an alternative yet equally user-friendly login method:
- Access the Classlink Dashboard: Users navigate to the Classlink dashboard provided by their educational institution.
- Select EHallPass App: Within the Classlink interface, users identify and select the EHallPass app from the dashboard.
- Login Prompt: Clicking on the EHallPass app directs users to the login page specific to EHallPass.
- Enter Credentials: Users input their designated username and password to complete the login process.
- Seamless Access: Upon successful verification, users are granted access to the EHallPass system, offering a smooth and integrated login experience.
Login Using GG4L: Widening Access Possibilities
GG4L extends accessibility to Ehallpass through its user-friendly login process:
- Access the GG4L Login Page: Users, whether teachers, students, or parents, begin by visiting the GG4L login page.
- Selection of EHallPass App: After logging in to GG4L, users locate and select the EHallPass app from the GG4L dashboard.
- EHallPass Login Page: Users are seamlessly redirected to the EHallPass login page within the GG4L framework.
- Input User Credentials: Depending on the user’s role (teacher/student/parent), appropriate login credentials are entered to proceed.
- Login Confirmation: Upon successful login authentication, users gain access to Ehallpass, ensuring a convenient and inclusive login process for various stakeholders.
These user-friendly login methods reflect Ehallpass’s commitment to accessibility and ease of use, accommodating diverse user preferences and ensuring a smooth entry into the platform’s functionalities.
Logging In Through Clever Integration
EHallpass offers streamlined integration with Clever, a popular single sign-on platform used by many schools. Logging in via Clever integration follows this process:
1. Go to Clever.com
Visit clever.com and log into your school’s Clever instance with your credentials.
2. Locate EHallpass
Find the EHallpass app tile on your Clever dashboard. Click the icon to launch.
3. Login to EHallpass
The Clever integration will automatically pass your login credentials to EHallpass. This logs you into your EHallpass account through Clever!
Using the Clever integration eliminates the need to remember separate credentials just for EHallpass. Single sign-on creates a seamless experience across platforms.
Ehallpass: Requesting a Hall Pass
The hallmark of Ehallpass lies in its ability to streamline the hall pass request process, allowing students to seek permission to leave classrooms with efficiency and clarity.
Importance and Process of Requesting a Hall Pass
When requesting a hall pass, students specify the reason for their departure and their intended destination. This clear communication assists in quick and accurate approval processes.
Specifying Reasons and Destinations
Students articulate their reasons for leaving the classroom, whether for restroom use, visiting the nurse’s office, accessing the library, or meeting with a teacher. Additionally, they indicate the specific location or person they plan to meet during their absence.
Submission Guidelines for Requests
Upon providing necessary details, students submit their hall pass requests through designated channels, whether it be directly to their teacher or through an online system tailored for such requests.
Administering Hall Pass Requests: Approvals and Denials
Managing pending requests and ensuring timely approvals or denials forms a crucial aspect of the Ehallpass system.
Managing Pending Requests
Teachers or authorized staff access a platform displaying pending requests, allowing them to review and address each request effectively.
Approving or Denying Requests
For each pending request, administrators make informed decisions, either granting permission for the student to leave the classroom or denying the request, requiring the student to remain in class.
Communication and Clarity for Requesters
To provide clarity or additional guidance, administrators can leave comments accompanying their decisions, ensuring that students understand the rationale behind the approval or denial of their hall pass request.
Exploring Hall Pass History via Ehallpass Login
Accessing Historical Data
Users can seamlessly access a dedicated section within the Ehallpass system to review their comprehensive record of prior hall pass requests.
Reflecting on Reasons and Results
- Reason Recap: Each entry in the hall pass history includes the initially stated reason for departure, providing users with a detailed summary of their past requests and the specific purposes behind them.
- Outcome Overview: Users gain insights into the status of each request, whether it was approved, denied, or remains pending. This feature delivers a clear picture of the results of their prior hall pass requests.
Significance of Archived Requests
The meticulous archive within Ehallpass serves as an invaluable resource. It enables users to comprehend their historical request patterns, ascertain the success rates of their requests, and reflect on the varied purposes that prompted their departures from the classroom.
Leveraging Insights for Future Requests
This retrospective view empowers users to make informed decisions when crafting future hall pass requests. By understanding past outcomes and trends, students can fine-tune their future requests, ensuring clearer communication and higher chances of approval.
Inception of Ehallpass: Visionary Founder
The brainchild of Nathan Hammond, Ehallpass emerged from the visionary perspective of a former teacher seeking to streamline exit pass requests and bolster school security.
Nathan Hammond’s Vision for Efficient School Management
With two decades of teaching experience, Nathan Hammond recognized inefficiencies in managing student movements. This insight drove the creation of Eduspire Solutions and the development of the digital platform, Ehallpass, aimed at optimizing school operations.
E-Hall Pass: Revolutionizing Student Movement Tracking
Ehallpass stands as a testament to Hammond’s vision, revolutionizing how schools manage student movements, enhancing security, and streamlining day-to-day operations.
Pricing and Setup of Ehallpass
Understanding the cost structure and setup requirements provides a comprehensive view of the implementation process and associated fees. Ehallpass incurs a cost of $3 per student along with a one-time implementation fee of $1,000. However, for precise and updated pricing, contacting Eduspire Solutions directly is recommended.
Personalizing Your EHallpass Account
Within the system, users can customize aspects for an optimal experience.
Set Favorite Destinations
Preset frequented hall pass destinations like bathrooms or offices to save time when requesting passes.
Organize Teachers
Students can favorite specific teachers for quick access when requesting passes.
Customize Pass Settings
Admins and teachers can create saved sets of rules and restrictions to apply to passes.
Update Profile Information
Keep profile details like name, grade level, schedules and contact info up to date.Leverage personalization where possible to tailor EHallpass to your preferences and usage patterns.